How to properly clean the sensor on your camera
Introduction
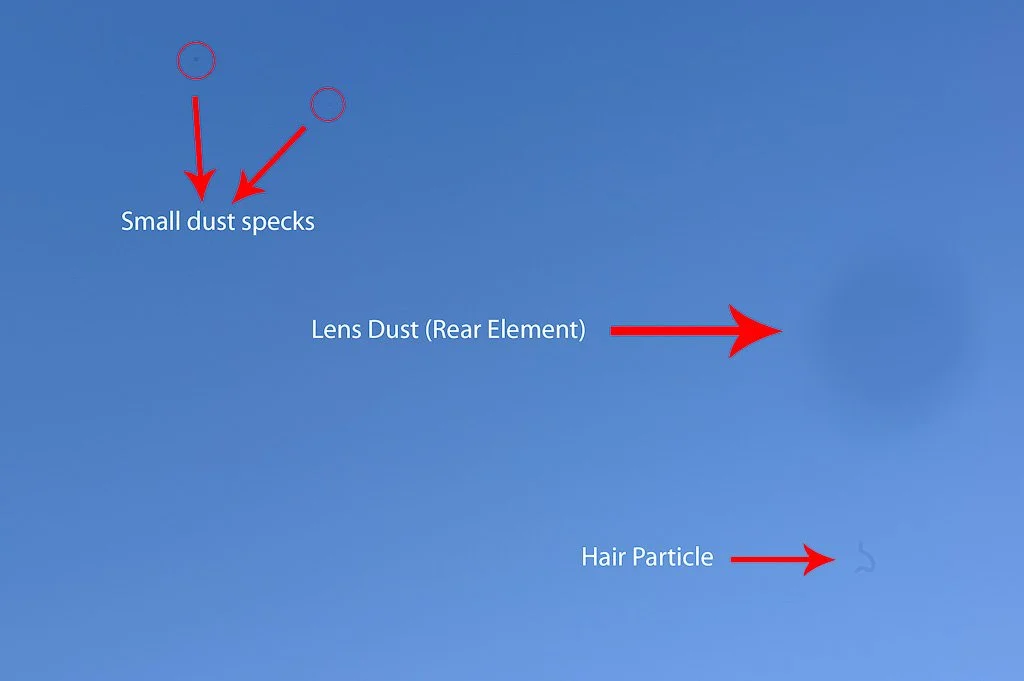
Have you ever wondered what those pesky black spots on your camera sensor are, seemingly appearing out of nowhere to spoil your perfect shot? Well, fret not, because you're not alone. Whether you're an amateur enthusiast or a seasoned professional, the cleanliness of your camera's sensor is paramount to capturing pristine photographs. Dust, debris, and other contaminants can easily find their way onto the sensor surface, manifesting as visible spots or blemishes in your images. But fear not, as cleaning your camera sensor doesn't have to be a daunting task. In this guide, we'll walk you through the steps to properly clean a digital or mirrorless camera sensor, ensuring that you can maintain optimal image quality and clarity.
How to Clean your Sensor
First and foremost, it's crucial to prepare a suitable environment for sensor cleaning. Find a clean and well-lit space where you can work without the risk of introducing additional dust or dirt to the sensor. Ensure that your camera battery is fully charged to keep the mirror or shutter open during the cleaning process, allowing easy access to the sensor. Additionally, gather the necessary tools for sensor cleaning, including a sensor cleaning kit specifically designed for your camera model. These kits typically include sensor cleaning swabs, sensor cleaning solution, and a blower brush, all essential for safely and effectively removing contaminants from the sensor surface.
Once you've prepared your workspace and assembled your tools, it's time to embark on the sensor cleaning process. Start by removing the lens from your camera body, taking care to place the camera with the sensor facing upward on a stable surface. Utilize a blower brush to gently remove any loose dust or debris from the sensor and its surrounding areas. This preliminary step helps minimize the risk of scratching the sensor during the subsequent cleaning process. Following the initial dust removal, inspect the sensor using the camera's sensor cleaning mode or a sensor loupe to identify any remaining contaminants.
Next Steps
With the sensor inspection complete, it's time to apply the sensor cleaning solution to a sensor cleaning swab. Ensure that the swab is only lightly moistened with the cleaning solution to prevent excess liquid from seeping into the camera. With a steady hand, gently swipe the moistened swab across the sensor surface in a single direction, exerting minimal pressure to avoid damaging the delicate sensor components. Use a different edge of the swab for each pass to prevent redistributing contaminants across the sensor.
After completing the cleaning process, perform a final inspection of the sensor to verify that all dust and spots have been effectively removed. If necessary, repeat the cleaning process with a fresh swab to achieve optimal results. Once satisfied with the cleanliness of the sensor, carefully reattach the lens to the camera body, ensuring a secure fit. Finally, take a test shot at a small aperture to confirm that the sensor is free from any remaining contaminants.
Conclusion
While cleaning your camera sensor may seem like a daunting task, following these simple steps can help maintain optimal image quality and ensure that those frustrating black spots are a thing of the past. With the right tools, technique, and a little bit of patience, you can keep your camera sensor in pristine condition, ready to capture stunning photographs with every click of the shutter. So, the next time you notice those telltale spots marring your images, don't despair—grab your sensor cleaning kit and get ready to restore your camera's sensor to its sparkling best.


